User Accounts in Windows 10
 User Accounts in Windows 10: a reader asks…
On my old PC, it was quite easy to set up separate desktops for all family members, but I can’t seem to figure out how to do it on the Dell with Windows 10 that we have now. Can you direct me to any instructions on this or tell me what to do?
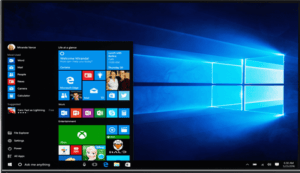
When you say ‘separate desktops’ I think you mean separate user accounts in Windows. Windows 10 has replaced the old Control Panel with a new Settings menu, and you do almost all the same types of functions in computer control that you did with Control Panel in this new place. It’s easy to get to the Settings menu, just click the Start button (that’s the icon at the bottom-left of your screen that looks like 4 white window panes). Clicking that opens your Start menu, and on the left side there are some icons. Click the one that looks like a gear, which is the Settings icon.
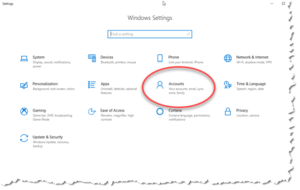
 The Settings window you have a number of control options, and the one you’re looking for is Accounts. Click that icon and you’ll open the control window to manage your user account and add, delete or manage other user accounts. On the Accounts window:
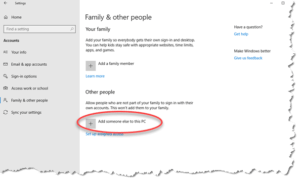
Click “Family & other people” on the left-side menu. You can then click the upper plus box to add a family member, or the lower plus box to add someone else.
Hint: Although it seems like you should choose to “Add a family member”, that method requires you to create a Microsoft account online for each person you add. This is too much work, so if you want to keep things simple, choose the other option: Click the plus sign icon “Add someone else to this PC”.
Advertisement
Now the next few steps can be a little tricky, here’s how to quickly get an account created with a minimum of work:
- You’ll see a form to use or create a Microsoft account for anyone you add. Look near the bottom of the window, and click the link that says “I don’t have this person’s sign-in information”.
- On the next screen, skip the form and click the link at the bottom “Add a user without a Microsoft account”
- Fill in a user name, and type in a password for that account (twice). You’ll also have to setup 3 security questions for the person you’re adding. Click the Next button you’re done!
 Now all you need to do is repeat this process for each person you want to have their own user account on that PC. Would that it be as simple and fast as it was before, but Microsoft really wants to make everybody use a Microsoft account instead of just a user account on the PC. You can always convert the local user account to a Microsoft account later on if you want. I think this is all just for future marketing…
Once you’ve created a new user account, you’ll see the account(s) listed at the bottom of the Accounts window. You can then click on each one to change the account type (either Standard or Administrative), or to delete the account. I recommend you leave the accounts you created as Standard accounts which have less privileges on the PC than your account – less chance someone can inadvertently mess up Windows.
This website runs on a patronage model. If you find my answers of value, please consider supporting me by sending any dollar amount via:
or by mailing a check/cash to PosiTek.net LLC 1934 Old Gallows Road, Suite 350, Tysons Corner VA 22182. I am not a non-profit, but your support helps me to continue delivering advice and consumer technology support to the public. Thanks!


