iTunes Copy Computer to Computer
 iTunes Copy Computer to Computer: a reader asks…
I have a newish macbook pro laptop and an old macbook pro laptop. I want to copy one iTunes music playlist from the new computer to the old one because at an upcoming event I want to have a 2nd computer that someone else can play the music during breaks etc while I am using another laptop to run my Powerpoint slide deck. Having 2 computers seemed like a great way to do this. And why not, since I have two. I would have thought once one logs into iTunes, one’s playlists would update itself on all devices. This is not the case. I have tried dragging the playlist of 83 songs onto an external drive (it does not drag). I have tried copying it to the external drive, it does not copy. I have tried exporting it from iTunes but it exports as a text file. I’m out of ideas. Any ideas, suggestions and help all greatly appreciated.
So first off, iTunes is a database program for your music and media with an integrated player. It is not a file system for your music files. So dragging items showing in iTunes to another location doesn’t work, since you’re only looking at a list of music in the database, not at a list of music files on your hard drive. Also a playlist is simply a text file of a list of songs, also not the music files themselves. If you really wanted to drag music files from your computer to an external drive, you’d be using the Finder window and working directly with the music files in the Music folder. iTunes was just never designed to do anything more than it does – help you organize and play your music library.
That said, iTunes has been integrated with iCloud for a number of years now, and the ‘Apple way’ of doing things is to sync your library and playlists with iCloud. All your computers and devices should be sync’d with the same Apple ID (aka iCloud login), and they’ll all show the same playlists and library. You can add songs and albums or other media to your library from any computer or device and they’ll show up in all your computers and devices.
 One thing to note, in iTunes you’ll see the cloud-with-arrow icon for songs & albums that are in your iCloud library but aren’t currently on your computer or device – tap or click that icon to download the song or album. You don’t have to download them as they will stream from iCloud if you hit play – as long as your computer or device is connected to the internet. Apple set things up this way because many folks have computers and/or devices that have very small hard drives or file storage. If you have a huge music and media library, you might fill up your storage and have all sorts of other problems besides missing music files.
You should never have to manually copy songs or playlists anymore, they are in your iCloud library and accessible (either for download or streaming) to all your computers and devices. You just have to make sure that you are logged into your (the same) Apple ID on all those computers and devices. This ensures that the same music library and playlists are available to you.
With iTunes on your Macs you have to do two things: 1) log into your Apple ID, and 2) authorize the computer to your account. Once you do that, your library and playlists will appear, although the actual music files won’t automatically download to the second computer until you choose to download them (either song by song or album by album). You can choose multiple songs in your library then click Song > Download as well as selecting a playlist and then selecting all the songs in the playlist (to download them all).
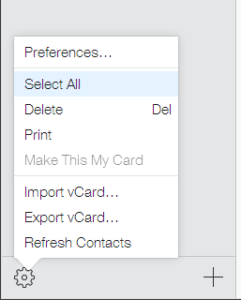
Hint, to select all songs on a list, click on any one of them then press the Command & A keys simultaneously – that’s the keyboard shortcut for “Select All”.
On your Mac hard drive, iTunes organizes the actual music files by artist and album, so trying to manually copy all the songs from a playlist to an external drive would be a lot of work unless they were all from the same artist and album. Otherwise it’s a lot of separate copying operations, navigating to all the places where song files are stored. In short, iTunes wasn’t designed for being used in any other way than as above, by using iCloud.
There are a few caveats, aka flies in the ointment. One is if your music library has songs that you didn’t purchase through the iTunes store, but imported from CDs. If you don’t subscribe to Apple Music and/or have the old iTunes Match service enabled (which is no longer sold), then you could find that the 5gb of storage space Apple gives you for iCloud storage isn’t enough and not everything will make it to iCloud. Also (another fly), iCloud doesn’t necessarily upload all your music from the computer into iCloud, some songs just won’t be uploaded even if you have the space. These are mostly non-commercial songs, mixes, personal recordings, etc.
In summary, the best way for you to get your library and playlist of songs from one computer to another is to use iCloud. Make sure your newish Macbook Pro’s iTunes library is sync’d with iCloud (File > Library > Update iCloud Music Library), and then on the old Macbook Pro’s iTunes, log into your Apple ID and also authorize that computer to your account. Then go to your playlist, select all the songs (Command and A keys) and then download them (Song > Download). Once downloaded, your old Macbook Pro can play all the songs even if not connected to the internet.
 The old manual way is still available, but more cumbersome. What you’d do is copy your entire music library (using the Finder window and selecting everything inside the Music folder) to an external drive, then plug that drive into the other computer. Fire up iTunes and use the File > Add to Library function. Select the music files on the external hard drive. You’ll have to also export your playlists, one-by-one, from within iTunes on the primary computer (to the external hard drive) and then import those playlists (again, one-by-one) into iTunes on the secondary computer.
This website runs on a patronage model. If you find my answers of value, please consider supporting me by sending any dollar amount via:
or by mailing a check/cash to PosiTek.net LLC 1934 Old Gallows Road, Suite 350, Tysons Corner VA 22182. I am not a non-profit, but your support helps me to continue delivering advice and consumer technology support to the public. Thanks!
 Hint, to select all songs on a list, click on any one of them then press the Command & A keys simultaneously – that’s the keyboard shortcut for “Select All”.


