Simple Backup
 Simple backup – a reader asks…
Can you give me the most uncomplicated way to backup my Windows computer please? I’d like to keep things simple without having all these online services and their complicated restore procedures.
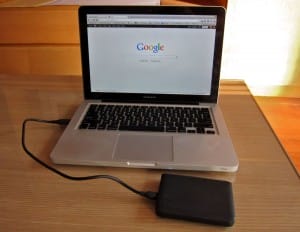
Backing up your computer is almost always uncomplicated, it’s the restoring part that gets complicated. So let me give you the simplest way to backup while keeping the restoral process simple as well (without using online services as you asked). First thing, you need a backup device. I recommend the Western Digital My Passport series of small external hard drives (like this one), although any storage drive with enough space will do. I like the My Passport drives because they’ll fit in your pocket, don’t need a power cable (just the USB data cable to attach to your PC), and are pretty durable – but don’t bang them around, they still have a spinning hard disk inside! You’ll also need one writeable DVD or a small thumbdrive (2-4gb is fine).
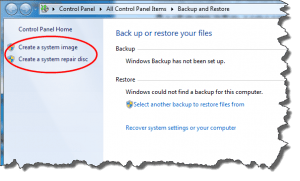
 You first have to do a one-time job – create a System Repair Disc (or drive).
- Insert your writeable DVD or plug in your thumbdrive.
- Run the “Create a system repair disc” program. In Windows 7, you get to that by clicking Start, then type “Backup and Restore” and hit your Enter key. Look for the link on the left-side of the window. In Windows 8/8.1, you have to do a search on “Windows 7 File Recovery” to find that window.
- Follow the on-screen instructions to create the disc or thumbdrive. When it’s done, put it in a safe place – I like to tape mine to the back or side of my desktop computer, or put it in the laptop bag.
The above one-time effort is because if you have a disaster and can’t run Windows, you’ll need this disc/drive to get Windows running so that you can restore your computer.
Now for the backup. Again, this is the simplest method, but not necessarily the best for all situations.
- Plug in your external hard drive.
- Run the “Create a system image” program. In Windows 7, you get to that by clicking Start, then type “Backup and Restore” and hit your Enter key. Look for the link on the left-side of the window. In Windows 8/8.1, you have to do a search on “Windows 7 File Recovery” to find that window.
- Follow the on-screen instructions to choose your external hard drive and start the backup process. It will take some time to complete, depending on how much you have on your computer’s hard drive. Once the process is done, you can unplug the external hard drive and put it away.
You can repeat this backup process as often as you like, some folks do it once every few months, some every few weeks. I like to do this weekly so if I’m recovering from a disaster, I’m only out a week’s worth of files.
 That’s it. To recover from a disaster and restore your computer, you’ll:
- Insert the System Repair disc or drive into the computer, and plug in the external hard drive.
- Start the computer, booting to the system repair disc/drive
- Follow the on-screen prompts to restore your computer from the system image that’s on the external hard drive.
The primary benefit is that if your hard drive crashes and you have to replace it, you can easily and quickly restore your computer with the above method.
Of course, all the above is more complicated than those online services you don’t want to use, but it is foolproof. If you want to explore online backup and recovery, I’d suggest you look at either CrashPlan (get the family plan here), or SOS Online Backup. Other choices are Carbonite and Mozy.
All the above are total computer backups, and their primary benefit is a quick and easy fix for system problems and hard drive crashes. The downside is that if you instead buy a new computer, you don’t want to try to restore using this method – every computer is different. For that type of scenario, read on.
Suppose you only want to backup your personal files and folders? The simplest method is to copy your personal folders from your computer to an external hard drive. Again, you’d start by getting an external hard drive and plugging it into your computer. Then,
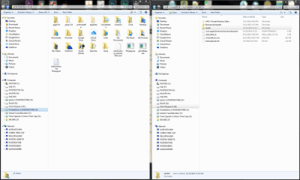
 Open a window to your external hard drive. Click Start, My Computer, and choose the external hard drive from the list to open it. I suggest you drag this window to the right-side of your screen (click and hold the top area of the window, drag it all the way to the right and let go).
- Open a second window to your personal folders. Click Start, My Computer, and your username. I suggest you drag this window to the left-side of your screen (click and hold the top area of the window, drat it all the way to the left and let go).
- On the left-side window, click on each of your personal folders and drag them to the right-side window. This copies the folder and its contents to your external drive, and may take some time depending on how big those folders and files are.
When you’re all done, you can unplug the external drive and put it away. Again, you can do this as often as you like. The primary benefit of this method is that you can easily use any of your personal files on any other computer just by plugging in the external drive and opening drive folder. If you replace your old computer with a new one, you can copy all these backed up files to the new computer and get right back to work. The downside is that you can’t recover your old computer from a crash (hard drive or otherwise) with this method.
There you have it, several uncomplicated ways to backup your computer. Personally, I’d use both methods, and be covered for just about any type of disaster.
This website runs on a patronage model. If you find my answers of value, please consider supporting me by sending any dollar amount via:
or by mailing a check/cash to PosiTek.net LLC 1934 Old Gallows Road, Suite 350, Tysons Corner VA 22182. I am not a non-profit, but your support helps me to continue delivering advice and consumer technology support to the public. Thanks!
 Open a window to your


