Win10 Recovery USB
 Win10 Recovery USB: a reader asks…
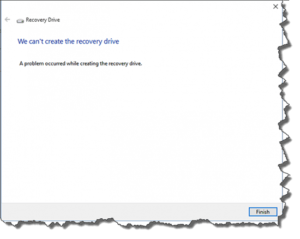
Hi Chris, I realized that my Windows 10 recovery USB was quite old, so last night I decided to create a new one. I found the recovery drive window, clicked on “Back up system files to the recovery drive” and waited…and it was still running in the morning. Any idea what’s going on?
Let’s first get some definitions in place here for the types of recovery items you can create in Windows.. For Windows 10, a ‘recovery drive’ is the same as the older ‘System Repair Disk’. This is a tool that you can use to boot up your computer if Windows isn’t working correctly. The recovery drive may or may not contain the system files needed to create a clean and fresh install of Windows on a blank hard drive (and don’t forget you’ll need a product key to activate Windows). The recovery drive does not contain all your personal files, nor does it contain the programs you’ve installed on your computer. Thumbdrive recovery drives are formatted by Windows as FAT32.
A ‘system image’ is a snapshot of your entire hard drive taken at a point in time. The system image is not bootable by itself, you’ll need to use it in tandem with the recovery drive in order to restore a computer system. This snapshot contains all the Windows system files as well as all your installed programs and your personal files. This system image can reside on an external hard drive (not a thumbdrive), or on a network storage drive, or on a secondary internal hard drive. You should never store a system image on your primary hard drive – most times the reason you’d need a system image is to recover from a primary hard drive crash. System images can be stored on a drive that’s formatted as NTFS.
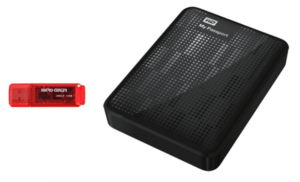
 So the recovery drive is put onto a thumbdrive, and the system image is usually put onto an external hard drive. You plug in both drives and power on your computer, booting to the thumbdrive. You can then run the system restore feature of Windows to restore the image that’s on the external hard drive to your primary internal hard drive. Just a word of warning, you should test these out immediately after you’ve created them to make sure they work right. If they don’t, there’s no sense putting them aside, since they won’t help you recover from a disaster.
Now there are three common fixes for the problem of not being able to complete the creation of a recovery drive.
First, you may have a problem with one or more Windows 10 system files. In order to fix this, you need to scan your hard drive for errors and correct them. Once that’s done, try creating a recovery drive again. Here’s how to scan your system:
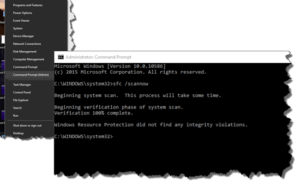
 Open a command prompt with administrator privileges. If you’re using a standard Windows account, you’ll need the password to an administrator account to proceed. Right-click the Start button, and choose the menu option “Command Prompt (Admin)”. This opens an old-style DOS window.
- In that window type (without the quotes): “sfc /scannow” and press your enter key
- Wait about 10 minutes for the process to complete. When done, type “exit” to close the command prompt window, after you’ve read the results.
This takes about 10 minutes to complete, and will check your critical system files for errors or corruption. If it finds any problems, it fixes them automatically.
 Second, your thumbdrive may be degraded in performance or otherwise damaged and can’t be used to create a recovery drive. Fortunately, thumbdrives are quite inexpensive, so you can just try another one. Although Microsoft says you can get away with a 4gb or 8gb thumbdrive, I suggest you get a 16gb thumbdrive so there’s no question about there being enough room to store all the files.
Third, you can use a separate media creation tool to create the thumb drive. Be sure your thumbdrive is inserted in the computer, and…
 Click this link: MediaCreation Tool to download the file
- Double-click the file you downloaded to run the program.
- Accept the EULA and then choose the option to create installation media for another PC. The next screen should be pre-selected for your system, so just click the Next button and it will create your thumbdrive.
When you’ve finished, you should label the thumbdrive and put it someplace safe, so you don’t accidentally use it for something else. If none of the above three fixes work for you, you might want to just try creating that thumbdrive one more time, but use a different USB port on your computer.
This website runs on a patronage model. If you find my answers of value, please consider supporting me by sending any dollar amount via:
or by mailing a check/cash to PosiTek.net LLC 1934 Old Gallows Road, Suite 350, Tysons Corner VA 22182. I am not a non-profit, but your support helps me to continue delivering advice and consumer technology support to the public. Thanks!
 Open a command prompt with administrator privileges. If you’re using a standard Windows account, you’ll need the password to an administrator account to proceed. Right-click the Start button, and choose the menu option “Command Prompt (Admin)”. This opens an old-style DOS window.
 Click this link:


