
A Warning about Apple ID and 2-factor Authentication
 While we do recommend that you use 2-factor authentication (read about what it is here), we do want to warn you about a quirk in the way Apple.com has implemented 2-factor authentication for your Apple ID. For any other online entity that offers 2-factor authentication to help protect your online account, there are methods for recovering your account in case of a problem. But for Apple, there’s an all-too-likely scenario that would make your Apple ID (and iCloud) locked up and leave you with no other option but to start over with a new Apple ID.
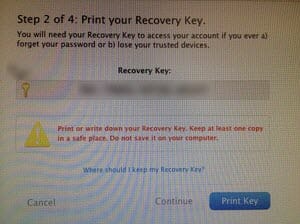
Here’s the scenario: A. You implement 2-factor authentication on your Apple ID/iCloud. B. When you do this, you are presented on-screen with a recovery key. C. You neglect to save this information. D. Subsequently, someone attempts to hack into your account, and wrongly guesses your password 10 times, thereby locking your Apple ID/iCloud account. Now here comes the pain:
Apple’s documentation says you must have access to at least two of three things needed to recover your Apple ID. Those things are:
- Your account password
- Your iPhone or other trusted device (which displays the authentication code)
- Your Recovery Key
However, in the above scenario, your account is now locked and your current password won’t work any longer. So you must have the other two items in order to restore your account. Without your recovery key, you’re dead in the water and Apple can’t help you. To their credit, when you setup 2-factor authentication, they do warn you to save your recovery key. But I wouldn’t be surprised if most people ignore this.
So now you’re in a pickle – without the recovery key, your Apple ID/iCloud account is locked forever and even Apple can’t recover it for you. Any purchases you made in the iTunes or App Stores are also locked away in that account. However, if you already have those purchases downloaded to a computer or iOS device, you still have access to them. But you can’t get any updates to Apps since you can’t log into the Apple ID to authorize the upgrade.
If you’re in this position, there’s only one way we’ve found that can possibly save you. If you did save the recovery key somewhere (say, your computer) and have a backup, you can search through the backup and find that recovery key. Didn’t say this was easy, but it is a remote possibility.
So a word of warning if you’re going to (or already) use 2-factor authentication on your Apple ID/iCloud account, remember to save that recovery key someplace where you’ll be able to get to it! Here’s what I’d suggest:
- Print the recovery key screen out and file it someplace where you’ll be able to get to it months or years from now
- Save the recovery key (combination of letters and numbers) in a note on your iOS device
- Save the recovery key in some other program or app (like Evernote, your calendar, or tasks)
You might think of this as redundant or overkill, but it’s better to have the recovery key in several places than in just one. Any of those places could become unreadable or unreachable, so having it in multiple places gives you better odds at being able to find it years from now when you desperately need it.
 If you’ve already setup 2-factor authentication on your Apple ID/iCloud account, and have already lost that recovery key, you need to immediately reset the recovery key before your account gets locked. Here’s how:
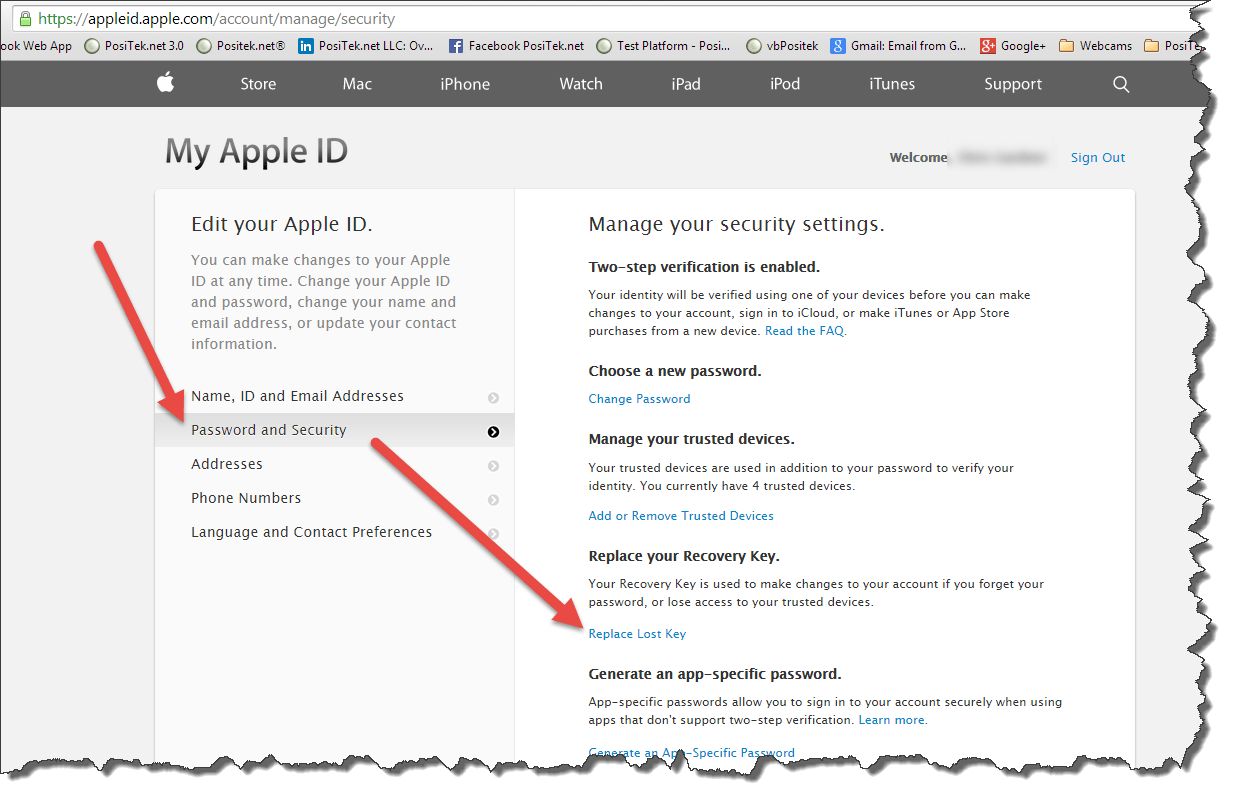
- On any web browser, go to https://appleid.apple.com/ and log into your account. You’ll get and use a 4-digit code on your trusted device to finish logging in.
- Click the Password and Security link on the left.
- Click the link on the right “Replace lost key” and follow the on-screen instructions. Be sure to save that new key!
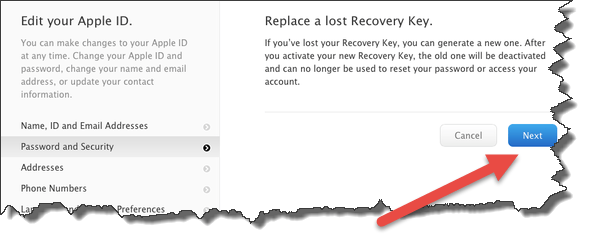 The on-screen instructions are simple, click the Next button and you’ll be presented with a screen display of your new key, which you can print and save. Save it in 3 different places for your best chance at having it when you need it later on. Be sure to complete the on-screen instructions (there are 4 steps) and then log out of your Apple ID/iCloud account.
This website runs on a patronage model. If you find my answers of value, please consider supporting me by sending any dollar amount via:
![]()
(@PosiTek)
![]()
(Support@PosiTek.net)
")
(using any credit card)
There are currently 1296 reader comments on published articles, care to join in? Use the Leave a Comment form below/at the bottom of any existing comments. This is a good place to ask follow-on questions on this subject.


