
Home Theater Sound Lag

Home Theater Sound Lag: a reader asks…
I have a home theater setup that works well except for one problem. The audio lags just a bit behind the video. Is this something I can fix? I use a projector (Epson Powerlite 3500), my receiver is a Yamaha HTR-5650, and my video sources are a FIOS TV One cable box (connected with RCA cables to receiver), a Sony Blu-ray player BDP-S550 (connected via HDMI to the projector, and an Amazon Firestick 4k (connected to the projector). I also have RCA cables that run from the projector to the receiver (2 sets of red/white and one yellow). Sometimes the lag is really noticeable, sometimes it’s just a little, but almost always I hear words spoken just a bit after I see the actor’s lips move.
I bet this problem is only an issue with the Blu-ray player and the Firestick, not the FIOS TV. The problem you’re encountering is the result of using different signal paths & methods to get video to the screen versus getting audio to the speakers. Specifically, you’re using digital video (for the Blu-ray and Firestick), and using analog audio (to get the sound to the receiver’s speakers).
For the FIOS TV, you’re using analog for both video and audio so there shouldn’t be a mismatch in video and audio. But because the digital audio from the Blu-ray player and Firestick has to be converted into analog audio (by the projector) to get to the receiver’s speakers, that introduces a delay in the audio – the lag you mention.
Since your receiver doesn’t have HDMI capability, you are stuck with plugging the Blu-ray player and Firestick directly into the projector. Normally, you’d be plugging all your sources into the receiver and letting it manage switching between them. This would eliminate the conversion of digital to analog that’s causing the lag.
For the FIOS TV, you are also sacrificing both digital HD video and digital audio capabilities of the FIOS TV One cable box by using the analog outputs (RCA yellow for video and red/white for stereo audio) instead of the digital HDMI OUT port.
Unfortunately, your particular receiver doesn’t appear to have the ability to adjust for lag. The manual for your receiver is here, but only shows lag/delay settings for digital audio and non-uniform placement of your speakers (page 41). You can try to adjust these settings, but I don’t expect you’ll see much improvement.
Ideally, you’d have a more modern receiver that has multiple HDMI IN ports and and HDMI OUT port (to send video to your projector). Then all your video and audio would be digital, and you’d get HD video from all your sources to the projector, and digital surround sound audio from all your sources to the speakers. But a new receiver might not be in your budget.

Fortunately, your receiver does have optical IN ports for digital audio, so you can/should use those instead of the RCA cables. A lower-cost alternative to a new receiver would be a simple HDMI switcher box that has digital audio extraction (and optical/coaxial digital audio output to send to your current receiver. Such as this one for $32. This switchbox has four HDMI IN ports to connect all your sources, an HDMI OUT port to connect to your projector, and an optical OUT port to connect the digital audio to one of your receiver’s optical IN ports. You’d also need an optical audio cable (aka Toslink, or SPDIF) such as this one for $13. If you don’t have an HDMI cable to use with your FIOS TV box, you’ll need one of those also.
Connecting this all up can be tricky, in part due to HD Copyright Protection (HDCP). First off, make sure to de-power all your home theater devices. Then, replace all your existing video/audio cable routing with this:

- Connect an HDMI cable from the switchbox’s HDMI OUT port to the projector’s HDM IN 1 port (you won’t be using HDMI 2 anymore). Also plug in the projector’s power, turn it on and set it to use the HDMI IN 1 port. You won’t be using the RCA cables any longer so remove them. Finally, turn the volume down on the projector’s built-in speakers, since you won’t be using them.
- Connect the optical cable from the switchbox’s Toslink port to the Optical D-TV/CBL port on the receiver (see page 9 of the receiver’s manual). Also plug in the receiver’s power, and set the receiver to use the D-TV/CBL source.
- Now plug the switchbox’s power cable into a wall outlet.
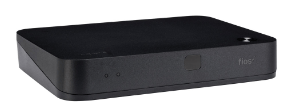
Now you can connect the FIOS TV One cable box to the switchbox with an HDMI cable (say to the switchbox’s HDMI 2 port). Be sure the switchbox is set to use HDMI 2, and you should be able to see video from FIOS TV on the screen and hear audio from your receiver’s speakers. Note that the audio from FIOS TV will now be digital audio with surround sound!

Next, plug in the DVD player with an HDMI cable (into the switchbox’s HDMI 3 port). Set the switchbox to use the HDMI 3 port (if it didn’t automatically switch) and you should see video from the DVD player on the screen and hear audio from the speakers (when you play a disc). This will also be digital audio with surround sound.
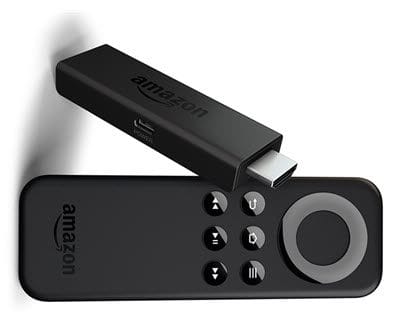
Finally, set the switchbox to use the HDMI 4 port first, and then plug in the Firestick to HDMI 4, and power the Firestick with the included microUSB cable/wall outlet power supply. You should see the Firestick on the screen and hear the matching audio from the speakers when playing content from the Firestick. This will also be digital audio with surround sound.
At this point, you should be seeing High Definition, digital video from all your sources on the screen, and you should be hearing gorgeous digital surround-sound (Digital Dolby/DTS/PCM) from the speakers for all your sources. You’ll leave the receiver set to use the D-TV/CBL source, and change sources using the switchbox’s included IR remote. Your Yamaha receiver will control the volume, and each sources’ remote will control each source (unless you use a universal remote).
For more detail on why you should do things in this order, see my article about HD Copyright Protection.
This website runs on a patronage model. If you find my answers of value, please consider supporting me by sending any dollar amount via:
![]()
(@PosiTek)
![]()
(Support@PosiTek.net)
")
(using any credit card)
There are currently 1298 reader comments on published articles, care to join in? Use the Leave a Comment form below/at the bottom of any existing comments. This is a good place to ask follow-on questions on this subject.


