
iOS17 Grocery Lists

iOS17 Grocery Lists: a reader asks…
I’ve been keeping my standing grocery list in the Notes app on my iPhone that I share with my husband. The list has those circles that I can tap on to fill in the circle, tap again to empty out. When we’re making a shopping list, we tap to fill the circle, and when we’re at the store shopping we tap to empty the circle. This has worked fine for many years, although as time goes on, my grocery item list got longer and longer, making it harder to manage. I read that iOS17 has the ability to auto-categorize grocery lists. Is this worth changing my process?
You can decide whether your existing method is easier or harder than the new method using Reminders in iOS17. If you already have your list organized by section (either type of item or by section of your grocery store), then you may not want to change. Apple has a handy how-to for creating a “self-organizing” grocery list in iOS17 at https://support.apple.com/en-us/HT213830. But that instruction is missing some of what I consider important information (see below).

While the new auto-categorizing grocery list feature in the Reminders app on iOS17 is pretty cool, it doesn’t work the same as what you’re used to. Basically, you create a new list in Reminders and when you tap on an item it disappears from the list. If you already have a grocery list in Notes, you can copy the entire list, and then create a new Reminder, classify it as “grocery”, then paste the list into the Reminder. It will auto-categorize, albeit with some quirky errors. You can choose to arrange things differently if you want by editing an item and moving it to a different category.
Here’s the important bit Apple left out in the link above: This feature is pretty slick, but there’s an important step you should take before you start using the Reminders grocery list:
- First, copy your master list into a new grocery list in Reminders,
- Then, save that list as a Template,
- From then on, when you want to create a shopping list, open and use that template to create a new shopping list.
Otherwise, you’ll have to create a new list everytime from scratch. By using a template, you can just create a master list with everything on it, and then create a temporary shopping list and delete the items you don’t want. If your master list is long, you may have a lot of tapping to do to remove items you don’t want on the list (each time).
If instead you simply want to categorize your list items in your existing Notes, you can do that manually by moving items around into groups and then adding category separators (e.g., Subheadings). On the iPhone you press and hold to highlight items, then choose the select menu option, then cut or copy option on the pop-up menu. If you’ve cut or copied, reposition your cursor under the appropriate heading and press and hold till the menu comes up, then choose Paste.
The two lists will look pretty much the same, but work differently. The advantage of using the Notes app is that you can keep the list you already have and just select and unselect items for each shopping trip without making a new list each time. The disadvantage is that the list can be very long! With a grocery list in Reminders, you’ll have some work each time you make a list (from the master template) to eliminate items you don’t want, so methinks no big advantage there.
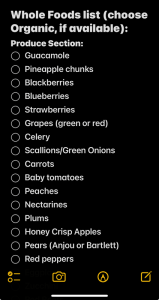
After considering and trying out the two workflows to accomplish this same task (creating and working with a grocery list), I’m inclined to say the new auto-arrange feature isn’t enough to make you switch and have to learn a new (and probably no better) process to manage your grocery list. I did take a few minutes to try making these lists in both apps, and the auto-categorize feature in Reminders isn’t foolproof. In my test, it put Q-tips in the Produce section! So Apple still has some work to do…
This website runs on a patronage model. If you find my answers of value, please consider supporting me by sending any dollar amount via:
![]()
(@PosiTek)
![]()
(Support@PosiTek.net)
")
(using any credit card)
There are currently 1296 reader comments on published articles, care to join in? Use the Leave a Comment form below/at the bottom of any existing comments. This is a good place to ask follow-on questions on this subject.


