
iPhone to Youtube
 iPhone to Youtube: a reader asks…
I am trying to make videos using my iPhone, can you give me a quick primer on what I should do? I’d like to put them up on Youtube.
So let’s assume you already have a Youtube account and know your username and password. You’ll need that to connect your iPhone’s video output to your Youtube account to upload videos. Let’s start with the simple and move to the more complicated:
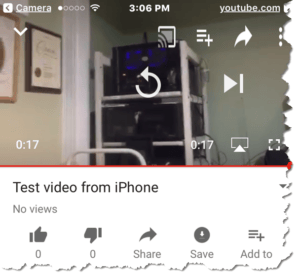
Simple: You want to upload a clip of video that you took with your iPhone without any editing, titling, etc. After you’ve recorded the video using the Camera app, tap the video image in the bottom-left to go to your Photos library and to the video you just took. you’ll see the sharing icon (square with an up arrow going out the top) – tap that and scroll across the app list till you see the Youtube icon, then tap that. You’ll need to sign in with your Google account and then give iOS permission to access that account. Then you’ll see a screen where you fill in the title, description, add tags, choose a category, and decide how much privacy you want. The privacy options are:
- Public: Anyone can watch the video and it’ll be listed on your personal Youtube channel, and be searchable online
- Unlisted: Anyone who has the URL can watch the video, it won’t be searchable online
- Private: Only people (who have a Youtube account of their own) you specify can watch the video
You can also choose between standard and high-definition video. The latter requires a Wi-Fi connection. Once you’ve filled in the boxes and made your choices, tap the Publish button. Depending on the definition you chose and the length of the video, it will be visible on Youtube shortly and you can look at it right from your iPhone in the Youtube app. In that app there’s also a share icon so you can email a link to the video, post it on Facebook, etc. Just remember that video can take a long time to upload, so be patient!
 More complicated: You have shot several clips of video and want to string them together into a single movie, add titles, transitions, edits and more. For that, you’ll use the iMovie app that came with your iPhone. Open the app and and you’ll see three tabs – you should be on the middle one Projects. Tap the box with the + sign in it to start a new project. You’ll then choose either Movie or trailer, choose Movie. At that point you’ll be taken to your media library where you can choose (by tapping each clip or the Select link) to choose all the video clips, photos and other media that will go into your movie. Then tap the Create Movie link.
At this point, you’ll want to have orientation lock turned off on your iPhone and you’ll rotate your iPhone sideways – that makes it easier to edit your movie. At the top of the screen is the playback window that shows you the movie, and beneath it is the timeline that has all your clips and other media arranged. Slide the timeline to left or right to scrub through the timeline. You can slide any of the items on the timeline to move them earlier or later in the movie by tapping and holding on the clip or item and sliding it left or right.
 Once you have all your clips and media in the order you want them, you can add a title to overlay on the first clip as well as other ‘effects’. Tap on a clip to edit the clip – you’ll see yellow handles where you can shorten the clip or split it into two clips, change the speed, adjust the audio, add titling, and change the look of the video – these are all effects that change how the clip plays. Most folks will want to put a title on the first clip. Tap that clip to select it, and tap the T on the timeline, then choose the type of title you want. Sample text will appear in the playback window, tap on the text in the playback window to change the text to words you like. Your keyboard will appear, use the backspace key and type away. Tap the Done key when you’re done with typing. Titling will be overlaid across the entire clip so if you want the title to fade out before the clip ends, just split the clip by swiping along the timeline to a point in the first clip where you want the title to end, tapping the scissors icon and then tap Split.
Feel free to get creative and try out any changes in clip order, titling etc. as there’s a handy undo button. There are a ton of other controls you can try out, just tap on one to see how it changes things. Such as freezing the action, speeding it up or slowing it down, changing the volume level. You will see a small overlay on top of the clip for each effect you have added to the clip. Tap to select a clip and tap any of the effect controls where you can change or remove them.
 You might also want to change the standard transition effect between clips. Tap on the hourglass icon between the clips to select the transition and choose another from the choices. You can also change the duration of the transition. You’ll see that when you tap the Done button you go back to the main screen and have to tap Edit to add more changes. Here you can also change the name of the movie from “My Movie” to whatever you like, just by tapping on the name to bring up the keyboard.
Remember that effects you give affect the entire clip. If you don’t want the entire clip affected the same way, just split the clip into two or more clips and you can assign different effects to each bit. When you’re all done editing your masterpiece, tap the share button to choose how to share it (Facebook, Youtube etc.). You can also export it as a movie file on your iPhone (the reverse of the share icon, a square with an arrow pointing inward).
When you’re finished, use the Share icon to publish to Youtube, same as the simple method above.
This isn’t meant to be a complete tutorial, you asked for a quick primer. I recommend you peruse some of the available Youtube video tutorials, just visit youtube.com and type into the search bar “iMovie on iPhone tutorial” and start watching.
This website runs on a patronage model. If you find my answers of value, please consider supporting me by sending any dollar amount via:
![]()
(@PosiTek)
![]()
(Support@PosiTek.net)
")
(using any credit card)
There are currently 1298 reader comments on published articles, care to join in? Use the Leave a Comment form below/at the bottom of any existing comments. This is a good place to ask follow-on questions on this subject.


