
Lost Mac Recovery
 Lost Mac Recovery: a reader asks…
I have a Mac with an external drive working with Time Machine for backups. If my Mac crashes or is lost or stolen, is it easier (certainly less time) to recover from a Time Machine backup than an iCloud backup? Should I do both?
Kudos to you for thinking about how to recover from a disaster before the disaster strikes! Most folks find out the hard way that pre-planning makes recovery so much easier. The exact process for disaster recovery depends on both having a plan and having practiced that plan so that when disaster strikes you can keep a clear head and get back to work quickly. We all know that our stress levels spike your Mac crashes or is stolen, and you don’t always do your best, logical thinking. So having actually gone through the recovery process at least once will help you keep calm while your digital life is in disarray (or worse!).
 Fyi, iCloud doesn’t make a full computer backup for Macs. It only backs up the items you select in System Preferences > iCloud, which doesn’t include your entire hard drive. Nor does it include your apps or other installed programs (except for Apple programs that came with the computer). iCloud as a backup method is intended for your iPhone and iPad, at least currently. I think this is in part because your Mac usually has a lot more file storage, which would chew up space on your data allocation. So for your Mac, iCloud offers you iCloud Drive to backup your personal files, plus the usual mail, contacts, calendars, etc.
Apple only gives you 5gb of storage space in each Apple ID/iCloud account, so you’ll probably need to have purchased additional storage space to cover all the personal files on your Mac. It’s probably worth doing for redundancy, in case both your Mac and your external drive were toasted (unlikely, but not impossible). But using iCloud should be a secondary method of backing up your Mac, especially since copying back files from iCloud to your Mac runs at internet speeds. That’s usually much slower than even USB 2.0 or Wi-Fi.
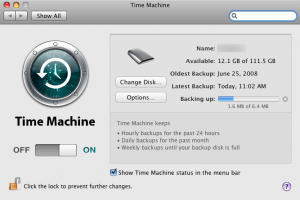 Your primary backup method for disaster recovery should be that external drive and your Time Machine backup. So if your Mac is toast, you will get it fixed or buy a new one and then use Migration Assistant to restore your Time Machine backup from your external drive to the new Mac. Fortunately, even if your Mac doesn’t have the Mac operating system, you can start your computer in Recovery Mode (hold down the Command and R keys while booting up), and install MacOS over the internet. Once you have a functioning Mac, you can use the Migration Assistant app (in Applications > Utilities) to restore your Time Machine backup.
If you have a new Mac, you’ll see when you first turn it on that you are offered the option to restore from a Time Machine backup – this is the easiest way to get back up and running. Follow the on-screen prompts to plug in your external hard drive and run Migration Assistant and you’ll be back to normal quickly. If you’ve already setup the Mac, then just open Applications > Utilities > Migration Assistant to restore from your Time Machine backup.
 Practicing this can make the difference between getting back up and running in an hour or so, and possibly days of downtime. You can avoid the panic that many folks suffer when a disaster strikes, and calmly get back to work with minimal downtime. Next to backing up, practicing a recovery is not something to be skipped.
One thing to be aware of is MacOS version differences. If your Time Machine backup is for a previous version of MacOS, and you are trying to restore to a newer version, not all your 3rd party programs will be automatically restored and you might have to re-install them. So one other handy bit of pre-planning would be to make a list of all the 3rd party programs you have installed. This can be as simple as taking a picture of each screen on your Launcher. Then make sure you retain access to the installation files (usually a .dmg file), either by leaving them in your Downloads folder, or saving them to your external hard drive (separate from the Time Machine backups, just manually copy or move the installation files to the external hard drive). Don’t forget any license keys that you need for 3rd party software.
This website runs on a patronage model. If you find my answers of value, please consider supporting me by sending any dollar amount via:
![]()
(@PosiTek)
![]()
(Support@PosiTek.net)
")
(using any credit card)
There are currently 1296 reader comments on published articles, care to join in? Use the Leave a Comment form below/at the bottom of any existing comments. This is a good place to ask follow-on questions on this subject.


