
MacOS on a Stick
 MacOS on a Stick: a reader asks…
I use a couple of Macs and sometimes wish I didn’t have to manage them separately. Is there a way that I can run my MacOS on an external thumbdrive and boot each Mac to that (not at the same time)?
It’s certainly possible to do that, just install your MacOS onto a thumbdrive. But I’ll warn you that it will be very slow compared to running the OS from the internal hard drive. If that doesn’t bother you, read on. But if it does, you should consider putting all your personal files (even the iTunes music library) on a removable drive and shuttling that from Mac to Mac. You could use a thumbdrive, but if your Mac has an SD Card slot you could also use a Transcend JetDrive to store those files. Check out my article More Space on Mac for info.
If you want to put the operating system and everything else on a thumbdrive (or the Transcend JetDrive), then connect the external drive to your Mac, get the MacOS Sierra download from the App Store, and go through the installation process – choosing the external drive instead of your internal drive. This will take some time, so be patient – USB speeds are vastly slower than internal hard drive speeds. Let me break that down for you:
 First, you’ll want to prepare the thumbdrive to be used as a boot device. Plug in the thumbdrive and open Disk Utility (Applications > Utilities > Disk Utility). On the left-side, select the thumbdrive disk and then click the Erase button (at the top). A small popup with three option boxes appears.
- Name the thumbdrive (something like “MacOS-on-a-stick”).
- Choose Mac OS Extended in the drop-down format type selector
- Choose GUID Partition Map in the Scheme section
Click the Erase button and wait till the process finishes before you close the Disk Utility window and proceed.
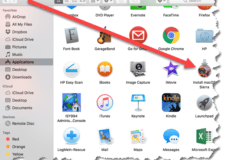 Second, visit the App Store and download the MacOS Sierra upgrade. This will put a file icon in your Applications folder titled “Install MacOS Sierra”. Make sure your thumbdrive is still plugged in, and run the program by double-clicking the icon.
At the first screen, press the Continue button to proceed. Agree to the terms and conditions (you’ll have to do this twice).
On the next screen, click the button “Show All Disks”.
Important! Be sure to select the thumbdrive at this point, otherwise you might overwrite your internal hard drive!
 Important! Be sure to select the thumbdrive at this point, otherwise you might overwrite your internal hard drive!
Follow the on-screen instructions to complete the process of installing MacOS Sierra onto your thumbdrive. Please note this may take an hour or more due to the much slower rate of USB versus internal disk reading and writing rates.
Once the process is complete, restart your Mac, holding down the Option key until a screen appears. At this point you’ll be able to choose which MacOS to run, so select the one on the thumbdrive. Remember, everything will run very much slower than normal. You’ll have to go through all the same steps to setup a new Mac including creating a user account and logging in to your iCloud account. You may also want to install the latest MacOS updates (this should probably be started before you retire for the night as it’ll take hours to run).
Open the Finder window and you’ll see your own MacOS-on-a-Stick entry on the left, and also the internal hard drive. You can navigate and copy any personal files you want onto the thumbdrive. You can also install other programs and utilities on the thumbdrive as well. When everything is setup the way you want it, shut down the Mac, unplug the thumbdrive and start the Mac up again, and it’ll boot to the internal hard drive. Now you can take your thumbdrive to any other Mac, plug it in and startup the Mac (holding down the Option key to select the thumbdrive as boot device).
This website runs on a patronage model. If you find my answers of value, please consider supporting me by sending any dollar amount via:
![]()
(@PosiTek)
![]()
(Support@PosiTek.net)
")
(using any credit card)
There are currently 1295 reader comments on published articles, care to join in? Use the Leave a Comment form below/at the bottom of any existing comments. This is a good place to ask follow-on questions on this subject.


