Rebuild Mac Photos Library
 Rebuild Mac Photos Library: a reader asks…
I seem to have damaged my Macbook’s Photos library as there are tons of photos in the library but they don’t show the images. What can I do?
The MacOS Photos app is really great about helping you manage your photos, but there are a few things to be aware of. First off, when you import photos into the app, the originals are stored in a hidden folder, and don’t appear in the Pictures folder on your computer. Instead you’ll see a single file called “Photo Library”. Unfortunately, a number of things can cause this file to disappear (including you deleting that file). Your first thing to try is to find that file (search for “Photo Library” either in Spotlight or Finder) and put it back in the original location. This location is in your User account under Pictures. Now re-open Photos and see if it’s all back. If not, continue on.
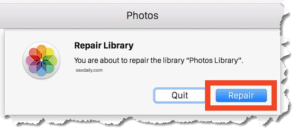
 The next thing to try is to repair the Photos app library. With Photos not running, hold down the option and command keys while you double-click the Photos app icon. You should see a popup box appear asking if you want to repair your library. Click the repair button and go get a cuppa coffee as the repair may take awhile.
If none of that works, then you can give this process a try:
- Open your Photos App, then click on Photos (in sidebar on the left)
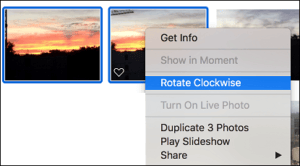
 Select one thumbnail and then press Command+a, in order to select all photos at once (or select just a few to try this out). After you’ve selected the photos, right-click and choose Rotate. This might take awhile.
- Once the app has rotated all the photos, right-click again to rotate the opposite direction to put them back to normal. At this point, the Photos app should have rebuilt the thumbnails.
If all else fails, then your operating system may have become corrupted. This is a bit more drastic to resolve. First, make a Time Machine backup of all your files, and make sure you have the installation programs (usually .dmg files) for all installed software. Also make a record of the customizations you’ve made to your Mac. Then:
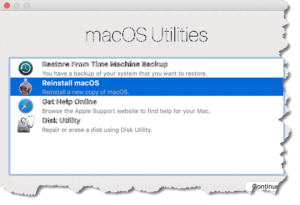
Restart your Mac in Recovery Mode. With the system off, hold down the Command and R keys while you press the power button. Keep holding down the Command and R keys until the system starts up (you’ll see the MacOS utility window).
Now erase your hard drive by opening Disk Utility, choose your internal hard drive on the left and click the Erase button. You’ll be presented with options to reformat the hard drive, so choose MacOS Extended and give your hard drive a name. Then click Erase.
 When the erasing process is done, quit Disk Utility. Now selecte Reinstall MacOS and follow the on-screen instructions. When the process is complete, you can restart your Mac, and go through the initial setup steps (you did this when you first got your Mac). Reinstall your programs, re-do your custom configurations and settings, and finally, restore your Time Machine backup.
At this point, you may have to re-import all your photos into the Photos app, you’re basically starting with a fresh and clean computer, the way it was when you first purchased it.
Of course if you have an Apple Store close by, and are still covered by warranty or AppleCare, you can make an appointment with the Genius bar. But they will basically do only some of the above (erasing your hard drive and reinstalling MacOS), you’ll still have to restore your personal files, install your programs etc.
This website runs on a patronage model. If you find my answers of value, please consider supporting me by sending any dollar amount via:
or by mailing a check/cash to PosiTek.net LLC 1934 Old Gallows Road, Suite 350, Tysons Corner VA 22182. I am not a non-profit, but your support helps me to continue delivering advice and consumer technology support to the public. Thanks!
 Select one thumbnail and then press Command+a, in order to select all photos at once (or select just a few to try this out). After you’ve selected the photos, right-click and choose Rotate. This might take awhile.


Great of this. Moreover, if you want to recover lost or deleted photos from Mac Photos library, just follow this video
https://youtu.be/4Bn7DGqnHy0