
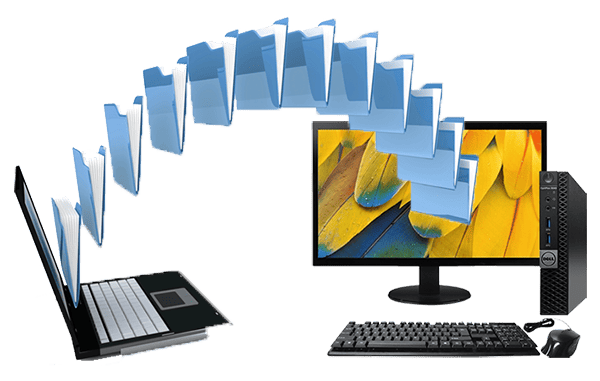
Share Document Laptop to Desktop
Share Document Laptop to Desktop: a reader asks…
I have two computers, a desktop PC that I use at home, and a laptop that I use for work. I drafted a document on my laptop and tried to save it to a thumbdrive. I kept trying to click on “Save As” and could not get to the thumbdrive. It only saved to OneDrive. I went to the desktop PC and clicked on the OneDrive icon, but the document isn’t there. How can I get this document saved to the thumbdrive so I can get it from my laptop to the desktop?
Since the file isn’t in OneDrive on the desktop PC, I’m going to assume you’re using two Microsoft accounts, one for work (laptop PC) and one for personal (desktop PC). Since you want to use the thumbdrive, I’ll give you those directions first, or you can skip down to the next section for using OneDrive to share the document.
Using Thumbdrive (aka “sneakernet”) sharing:
The thumbdrive method is a lot of extra work, you have to save the document to the thumbdrive, eject that from your laptop and plug it into your desktop, then navigate your File Explorer app to the thumbdrive to open the document file. Now you have two copies of the document (one in OneDrive and one on the thumbdrive) and you have to keep track of which one is the most current.
I’m guessing the problem with using the thumbdrive is that Microsoft wants everybody to use OneDrive to save their documents and other files (when using a Microsoft app like Word). So Microsoft doesn’t make it as clear how to navigate to another file or folder location outside of OneDrive. You need to look at that “Save As” window again, with these hints:

That Save As window has three columns:
- The left-most column (blue background) is the menu bar
- The middle column (under “Save As”” is the location picker
- The right-most column is the Pinned and Recents list of locations
Focus on that middle column – you’ll see OneDrive, and you’ll also see an “Other Locations” list underneath. On that list is a “Browse” menu item. That’s the location picker item you need to get to your thumbdrive. Click “Browse” and you’ll open a File Explorer window.
The File Explorer window has a left-most column list of locations. Scroll down that list till you see a lettered entry for your Thumbdrive (like D:). Click it to choose that location.
Next you can use the default filename already filled in, or you can change it to whatever filename you wish. Don’t change the ending of the filename – all Word documents should end in “.docx”. Then click the Save button at the bottom-right of the File Explorer window.
Now you can eject that thumbdrive and plug it into the desktop PC. Open a File Explorer window, and scroll down the left-side list of locations till you find your thumbdrive and click on it to select it. To the right you’ll see all the files saved to that thumbdrive. Double-click on your document file to open it in Word.
Using OneDrive sharing:
OneDrive is so much simpler than sneakernet – usually. I’ve guessed that your laptop is logged into a work Microsoft account, and your desktop PC is logged into your personal Microsoft account. That’s why you didn’t see the document – each computer uses a different OneDrive.
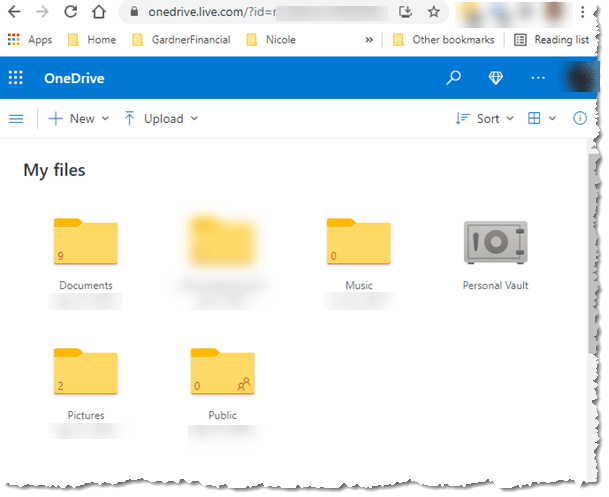
One way around this is to share the document with the other Microsoft account. Once you’ve saved that document to your laptop’s OneDrive, you can open OneDrive in a web browser on the laptop – click: https://onedrive.live.com/ and log in with your work Microsoft account credentials (username, password and possibly a 2-factor authentication code). You’ll see a File Explorer-like window in the browser with your OneDrive folders.
Likely you saved your document to the Documents folder, so click on that to navigate inside. Scroll down the list of files till you see your document. Right-click on that document to open a menu, and left-click on the “Share” menu item. That opens a little “Send Link” window where you type in the email address of your other Microsoft account), type an optional message, and click the blue Send button.
Note that the default sharing method is “Anyone with the link can edit” – you can change that by clicking on those words to bring up a menu of choices for sharing. You can uncheck editing capability (make the shared document “read-only”, or choose to only share with specific people versus anyone with the link (I recommend this). You can also set an expiration date to stop sharing that document, and even password-protect the shared document.
Microsoft Business and Personal OneDrive on same computer:
A second method for doing this might make more sense for you, since you’re essentially sharing with yourself. This only works if your work Microsoft account is a true business account (e.g., Microsoft 365 for Business). If this is the case, you can add that business account to your OneDrive settings on the desktop PC, so you can access your business OneDrive files as well as your personal OneDrive files. This essentially puts two OneDrive entries in File Explorer, one personal and one for work.
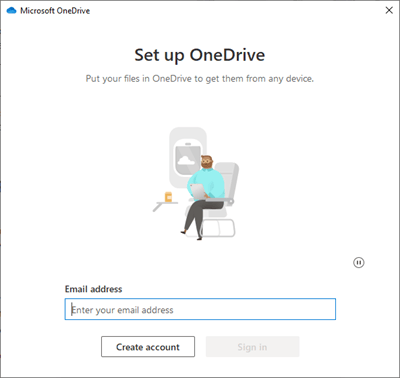
To start, right-click the OneDrive icon in your system notification area (bottom-right of your screen) on your desktop PC. Select “Settings”. on the little sub-menu. Go to the Account tab and click the “Add an account” button. This gives you a Set up OneDrive window where you’ll log into your business Microsoft account. Type in the email address associated with your work laptop’s Microsoft account and click the Sign In button. Follow the on-screen instructions to add that account to the desktop PC. Viola, you now have two OneDrive entries in the left-side list of File Explorer, and can see all your work files.
Just in case: you may not have a business account with Microsoft. Many small businesses try to save money and use personal Microsoft accounts. If this is your situation, recognize that Microsoft doesn’t like this and the above procedure won’t work.
Another alternative is to use another cloud-storage solution besides OneDrive to share files. Choose one that you can setup on both laptop and desktop PC. Options include Google Drive if you have a Google account), iCloud Drive (if you have an Apple ID), and Dropbox. Each of these has a free version (with limitations). I would recommend that you only save your file in either OneDrive or the other location – not both. That way you avoid having two versions of your document.
This website runs on a patronage model. If you find my answers of value, please consider supporting me by sending any dollar amount via:
![]()
(@PosiTek)
![]()
(Support@PosiTek.net)
")
(using any credit card)
There are currently 1296 reader comments on published articles, care to join in? Use the Leave a Comment form below/at the bottom of any existing comments. This is a good place to ask follow-on questions on this subject.


