
Using MS OneDrive on Mac
Using MS OneDrive on Mac: a reader asks…
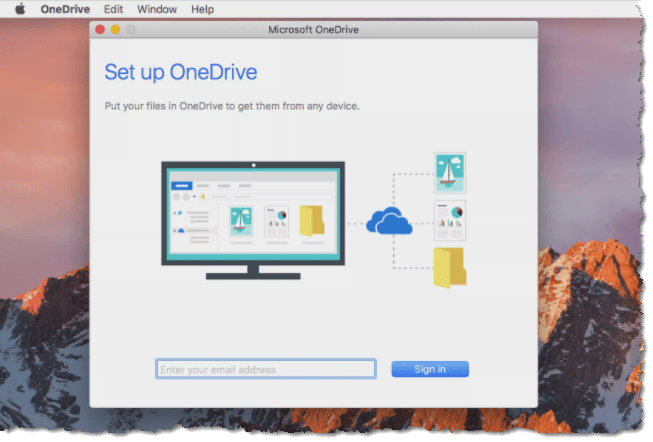
I have a recent Macbook and also have a Microsoft 365 account and subscription. That gives me a terabyte of cloud storage on OneDrive. How can I use this storage space to backup all my Mac’s personal files? I’ve already installed MS 365 and configured the default OneDrive folder. I’d like to add the Mac’s Documents, Downloads, Music, Pictures and Video folders to OneDrive.
Using MS 365’s OneDrive on a Mac adds a layer of complication, since Apple provides iCloud. OneDrive and iCloud are essentially the same type of cloud-based file storage services. With iCloud, you only get 5gb of storage space without paying extra. Since you’re already paying Microsoft for the 1tb of space that comes with the subscription, you will forego using iCloud to store your personal files, and instead store them in OneDrive.
When you setup OneDrive, it created a OneDrive folder and created sub-folders inside. All those sub-folders inside of OneDrive are backed up to the cloud, and anything you put in there will also back up to the OneDrive cloud. You may want to remove those sub-folders, so they don’t complicate things further with the folders you’ll be moving in.
Adding to the complication is the fact that the Apple Photos app uses the Pictures folder to store all your photos, but doesn’t store them as files right in the Pictures folder. Instead, the Photos app creates a special Photos Library folder that hides all the photos – you only access your pictures through the app. This app also syncs with iCloud to store your photo library.
In order to move all your personal folders inside the OneDrive folder, you’ll need to use the Mac’s Terminal applet and use specially formulated commands to first move each folder, and then create aliases for each folder which point to the old location. This can be tricky and you have to type these commands 100% correctly, or you can have unintended consequences.
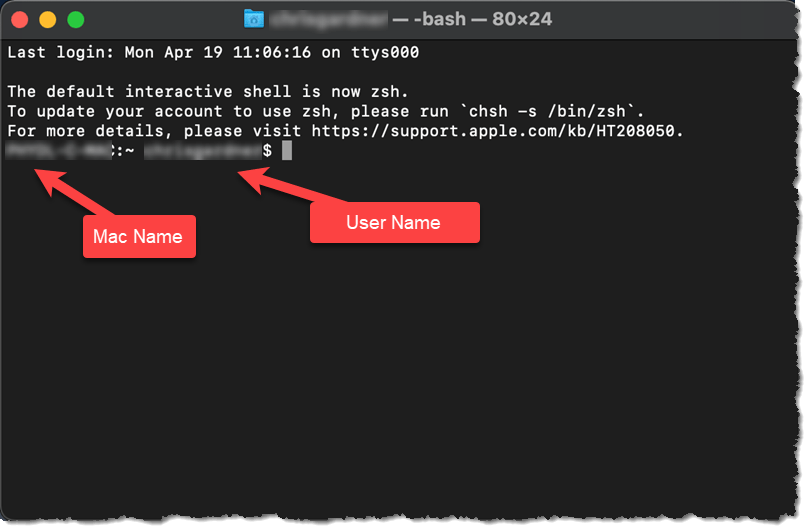
Let’s move your Documents folder first. Open the Terminal applet. Either hit Command and the space keys, or click the Spotlight icon at the top-right of your screen (magnifying glass icon). Where it says “Spotlight Search”, type “terminal” and a window will open to your user folder. You’ll see a command line (with your Mac’s name and your username with a $ sign). This command line has a cursor to the right where you’ll carefully type each of these two commands (pressing the enter key after each one):
sudo mv ~/Documents /Users/username/OneDrive/Documents
ln -s “/Users/username/OneDrive/Documents” ~/Documents
In the commands above, be sure to replace ‘username’ with your actual username. Be sure to include spaces where shown in the above commands. You will be prompted to enter in your account password to execute these commands. If you see an error message in the Terminal window, something didn’t work right (likely you mis-typed something). Otherwise it will simply show the command line again. One possible gotcha is if you already have a folder inside OneDrive that has the same name as the folders you’re moving. To prevent this, make sure the OneDrive folder is empty before beginning.
Now repeat these commands for any other folders you’d like to move, replacing the “Documents” in the commands with Downloads, Music, Pictures and Video. To do these all will take two commands for each one. Once this is successfully completed, you can type exit on the Terminal command line and then quit the Terminal applet.
The first command above moves (‘mv’) the folder into your OneDrive folder. The second command above (‘ln’) creates an alias so that all your apps which save to the default macOS personal folders are linked to the new location for saving files.
From this point forward, you’ll be saving files in those folders that are actually inside the OneDrive folder. Your list of favorites on the left-side of the Finder window may have changed, so you can re-create the favorites list by going to your OneDrive folder, and then dragging each of the Documents, Downloads, Music, Pictures and Video links from the right-side to the Favorites list on the left-side of the Finder window.
Finally you’ll want to double-check that everything’s working correctly. Click the OneDrive icon at the top of your screen > Help & Settings > Preferences. This opens a small window with tabs across the top. You’ll be on the Preferences tab.
Click the Account tab and then the Choose Folders button. Make sure the checkboxes are all checked for the folders inside OneDrive.
There’s another option you might consider, especially if your Mac’s internal hard drive is small. Turn on Files On-Demand. That’s a button in the same Preferences window you opened up just above. What this does is save space on your internal hard drive by saving the files in the cloud, and only saving thumbnails in your folder that link to the cloud-based file. You only download files to your Mac that you’re working on. Once you’ve finished working on a file, you can 2-finger tap the file and choose the menu option “Free up space” to put it back in the cloud. Hint: make sure you keep your Photos Library on your computer otherwise the Apple Photos app will have a more difficult time working, taking a long time to start up.
This website runs on a patronage model. If you find my answers of value, please consider supporting me by sending any dollar amount via:
![]()
(@PosiTek)
![]()
(Support@PosiTek.net)
")
(using any credit card)
There are currently 1298 reader comments on published articles, care to join in? Use the Leave a Comment form below/at the bottom of any existing comments. This is a good place to ask follow-on questions on this subject.


