Windows 10 using DISM
 Windows 10 using DISM: a reader asks…
I have a Windows 10 computer that’s running a little wonky these days. I have your recommended security protection, keep up-to-date on Windows Updates and such, so I’m not sure what’s going on. I read online about using a program called “DISM”, can you tell me what that is and how to use it?
Per Microsoft, DISM stands for Deployment Image Servicing and Management and is an old-style DOS command-line tool that is used to both mount Windows images as well as service and repair Windows images. This program can be run even if Windows won’t run – as long as your hard drive hasn’t crashed you can boot your computer into DOS, and run the DISM tool. If Windows is running on your system, you can run it right from a command window (aka, Windows Powershell).
 I last wrote an article a few years ago about using DISM, see Win10 Start Busted. That article lays out how to use Powershell to use command-line tools like DISM. Powershell is very similar to the old DOS-style windows, but updated for Windows 10. To start Powershell, use your right mouse button and click on the Start menu, then use your left mouse button to click/select “Windows Powershell (Admin)”. After approving a UAC prompt, that opens a simple window with a blue background, and your cursor is blinking, ready to accept a typed command.
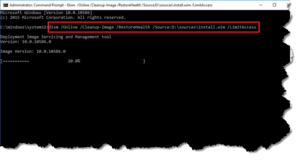
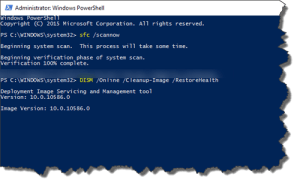
Making a command is pretty basic, type the command itself, followed by (sometimes optional) parameters that adjust how the command runs. In the case of DISM and your computer (with Windows working), you’d type the command “DISM” followed by “/online” and then two other optional parameters: “/cleanup-image” and “/restorehealth”. Leave a space between the parameters, and of course don’t include the quotes. Here’s what it looks like:
DISM /Online /Cleanup-Image /RestoreHealth
Once you’ve typed that command (no mistakes! copy and paste from above if you like), press your Enter key and let the utility run. It may take some time to complete. I should mention that another DOS command is often used as well, the SFC command, with the optional parameter “/scannow”.
sfc /scannow
That command scans your hard disk to find and repair any errors on the disk. You never know if a disk error caused the damage to Windows, or if something else did, so it’s a good idea to run the SFC command before or after the DISM command.
![]() Our friends at WindowsCentral.com have published a more complete guide to using DISM, at https://www.windowscentral.com/how-use-dism-command-line-utility-repair-windows-10-image. They include instructions for getting a fresh and clean image of Windows to use (in case the copy on your computer is corrupted). And just a word of warning, using command-line tools can be dangerous, mistakes can cause more harm than good. If you’re at all not sure about what you’re doing, consult a professional. You wouldn’t want to turn your computer into an expensive paperweight or cost you a lot more money to fix what you broke!
Our friends at WindowsCentral.com have published a more complete guide to using DISM, at https://www.windowscentral.com/how-use-dism-command-line-utility-repair-windows-10-image. They include instructions for getting a fresh and clean image of Windows to use (in case the copy on your computer is corrupted). And just a word of warning, using command-line tools can be dangerous, mistakes can cause more harm than good. If you’re at all not sure about what you’re doing, consult a professional. You wouldn’t want to turn your computer into an expensive paperweight or cost you a lot more money to fix what you broke!
This website runs on a patronage model. If you find my answers of value, please consider supporting me by sending any dollar amount via:
or by mailing a check/cash to PosiTek.net LLC 1934 Old Gallows Road, Suite 350, Tysons Corner VA 22182. I am not a non-profit, but your support helps me to continue delivering advice and consumer technology support to the public. Thanks!


Pingback: Windows 10 April Update - Practical Help for Your Digital Life®