
Mac Emergency Boot
 Mac Emergency Boot: a reader asks…
Hi Chris, my Mac is working ok now, but I’m wondering if there’s something I should be doing in case disaster hits? Other than backing up (I use Time Machine), is there anything you think I should do?
For Mac users, system reliability is pretty much taken for granted. Macs just work – almost all the time! But almost does mean that occasionally they fail. For that, having an Emergency Boot disk (better yet, a thumbdrive) can be a lifesaver. Think of it like you think how you deal with other risks:
- You have life insurance for the off-chance that you’ll die sooner rather than later
- You have auto insurance, but hope you never have to need it
- You routinely balance the risk of something happening against the cost of preventing it from happening
 I should say up-front that this post is aimed at both ‘enthusiasts’ and folks who are interested in how their computer works or worried about what will happen if (actually when) something goes wrong. But even if you aren’t either, creating an emergency boot drive can help you quickly get out of trouble or make it easier for someone else to help you get out of trouble. Like your neighbor’s son, your techie brother-in-law, or someone else you turn to for help.
After all, most people who use computers do not have an IT support department – you depend on someone you know or hire. For the latter case, having an emergency boot disk handy can save you hundreds of dollars off your repair bill.
Of course, if you have a handy Apple Store nearby, you can always bring your Mac to them, and AppleCare customers have it even easier. For everyone else, you can ship your Mac to an Apple repair center. But this may not be a good solution for you – you might not want to let your Mac out of your sight, you can’t be without your Mac for more than a day, or you may just want to save money. If this is you, this post’s for you!
 Assuming you’re still with me, making an emergency boot drive is a worthwhile, one-time endeavor. Actually, you’ll need to re-do this any time you upgrade your Mac OS X version (like from 10.6.8 to 10.9.1). Don’t worry about the minor updates (say going from 10.9.0 to 10.9.1), just look for anything that changes either the first or second set of numbers (the 10.x.x going to 11.x.x, or the 10.6.x going to 10.9.x). So let’s break down the process of doing this, and then I’ll give you the steps needed to do each of the processes. Here are the processes:
- Get yourself a USB thumbdrive – 8gb or larger. It doesn’t really matter whether it’s USB 2.0 or 3.0, but the 3.0 will work faster on newer Macs. Once you have that, format it to be used as a boot drive (aka your emergency boot disk)
- Download the Mac OS X from the App Store and prepare your Mac to create the emergency boot drive
- Create the emergency boot files, put them on the USB thumbdrive, then reset your Mac
![]()
 Sounds simple right? But each of these processes has some specific steps that you need to follow in order and without mistakes. Skipping a step or doing step 3 before step 2 can give you a thumbdrive that won’t help you in an emergency or worse, make your Mac misbehave! And a preliminary step is to first make sure your Mac is already up-to-date! See this how-to guide for more info about how to upgrade your Mac to Mavericks, or this article for how to get the latest updates for your Mac (if you already have Mavericks).
Here’s what you need to do to create your USB thumbdrive as an emergency boot disk:
 So the first process is to get a USB thumbdrive – they are sold in your office supply store, a computer store, even in a copy center like your local Kinko’s/Fedex store. You can use one you already have, but everything on it will be erased and it can’t be used for regular file storage afterwards. Here’s how to format that thumbdrive to use as your emergency boot disk (actually drive, but you get the idea):
- Plug the thumbdrive into your Mac, and open Disk Utility (found in Applications > Utilities), and click on the disk entry in the left-side list to select it.
- Now click on Partition and change Current to 1 Partition. Click on Format and change it to Mac OS Extended (Journaled). You can change the name to something like “Mac OS X 10.9 Emergency Boot”, or just make a small label and paste it onto the thumbdrive case.
- Click on Options in Disk Utility and choose ‘GUID Partition Table’. These settings turn your thumbdrive into a boot drive. Click on OK, then click Apply and Partition to kick off the formatting process. It’ll only take a minute or so.
Now you have a thumbdrive ready to be turned into the emergency boot drive. The second process is to download OS X from the App Store and get your Mac ready to go:
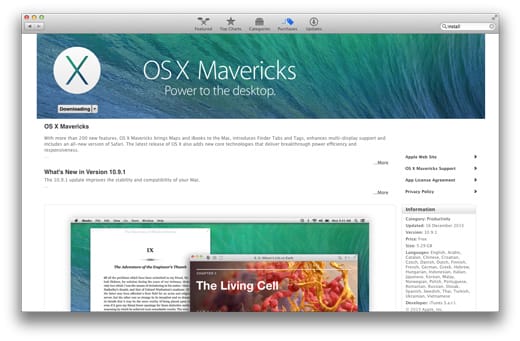
- Open the App Store and search for Mac OS X Mavericks. Now click on Download (if you haven’t already installed it, click ‘Free and Install’ instead). Once it’s done downloading, it’ll automatically launch the Mac OS X Installer – so just click on ‘Install OS X’ and then immediately click on the menu item ‘Quit Install OS X’ – you just want the files, continuing would re-install Mavericks!
- Open the Terminal app inside the Utilities folder, then copy and paste this command into the window:
“defaults write com.apple.finder AppleShowAllFiles 1 && killall Finder”
Copy everything between the quotes, but not the quotes themselves. Then press the Return key. Finally, restart the finder window by holding down the Alt key and clicking the Finder icon in your Dock. Once you do this you’ll see all your files, even the hidden ones.
- Find ‘Install Mac OS X’ file in the Applications folder. Right-click it (2-finger tap or Command-click) and click on ‘Show Package Contents’ on the menu that pops up. Open that Contents folder, then open the ‘SharedSupport’ folder and double click the ‘InstallESD.dmg’ file. That will show the OS X Install ESD folder in the Finder window.
 You are now ready to create that emergency boot drive as the third process:
- Double click the Install ESD folder and locate the BaseSystem.dmg folder (it should be in a light grey to signify that it is a hidden folder). Return to Disk Utility and Drag the Basesystem.dmg from the Finder to the Source field in Disk Utility. Now drag the Mac OS X 10.9 Installer volume from the Sidebar to the Destination field in Disk Utility.
- Now click on Restore and Erase. The installation process takes around 20 minutes depending on the speed of your system. Once the files have copied over, the Install Mac OS X 10.9 drive should mount automatically. Open the install Mac OS X 10.9 volume and navigate to System, Installation delete the alias file to the Packages. Now return to the OS X Install ESD folder and drag the Packages folder to the System / Installation folder on the Install Mac OS X 10.9 volume you’ve just created. Drop the Packages folder into the same place (System / Installation) where you just deleted the Packages Alias.
- Lastly, you’ll want to reverse the hidden file setting to put your Mac back to normal. Open the Terminal app inside the Utilities folder, then copy and paste this command into the window:
“defaults write com.apple.finder AppleShowAllFiles 0 && killall Finder”
Copy everything between the quotes, but not the quotes themselves. Then press the Enter key. Finally, restart the finder window by holding down the Alt key and clicking the Finder icon in your Dock. Once you do this you’ll see all your files, but not the hidden ones.
 That’s it! Eject the USB thumbdrive using your finder window, then unplug it and store it someplace safe. Anytime you need it, just plug it back into your Mac, and hold down the Alt key while booting up. Choose that drive to boot from, and then follow the Install Mac OS X instructions.
 I should mention that you can also create an emergency boot drive with an older version of Mac OS X (like Lion or Mountain Lion), but we think you’re better off sticking with the latest operating system version for your Mac. You can find the existing Lion or Mountain Lion installation file in the ‘Applications’ folder and is called “Install Mac OS X Mountain Lion” or something like that. The process is a little different than what I outlined above, so please use the comments below if you need more help.
And lastly, you may have already realized that this how-to works for all Macs – even those without CD/DVD drives (like the Macbook Air)! If your Mac has a built-in CD/DVD drive you may still want to use a thumbdrive, it’s easier and thumbdrives are cheap now.
This website runs on a patronage model. If you find my answers of value, please consider supporting me by sending any dollar amount via:
![]()
(@PosiTek)
![]()
(Support@PosiTek.net)
")
(using any credit card)
There are currently 1295 reader comments on published articles, care to join in? Use the Leave a Comment form below/at the bottom of any existing comments. This is a good place to ask follow-on questions on this subject.


